#how to learn slip knot stich||#knitting for beginners||#हिंदी में
इस article में #slip knot stich बताई हूं (#how to learn slip knot stich) जो knitting beginners के लिए बहुत important है।ये simple और easy है।ये #free knitting tutorial है।
Knitting beginners के लिए मेरी blog की इस article को भी पढ़ें:-
उल्टा और सीधा कैसे बुने:-
https://shilpygarments.blogspot.com/2019/04/knitting-for-beginners-basics-of.html
Knitting beginners के लिए youtube वीडियो की link:-
फंदे कैसे डाले:-https://youtu.be/HAitfMLEAg8
उल्टा और सीधा कैसे बुनें:-https://youtu.be/3A3f4MeU9Zk
स्वेटर के नापने(measurment) का सही तरीका:-https://youtu.be/c9BhElhciVY
, मेरी youtube channel “shilpy garments”
को जरूर subscribe करें:-
https://m.youtube.com/shilpygarments
Tips of knitting
Knitting beginners के लिए slip knot stitch पहली step है।बुनाई की शुरुआत हमेशा 11 या 12 number की सलाई से ही शुरू करनी चाहिए क्योंकि ये पतली होती है और इससे ज्यादा आसानी से बुनाई सीख सकते हैं।
सलाई हमेशा किसी अच्छी ब्रांड (brand) की use करें।मैं हमेशा “pony” brand की सलाई suggest करूंगी।इसकी उपर की point बहुत अच्छी और नुकीली होती है और जल्दी खराब भी नहीं होती।
slip knot बुनाई की सबसे पहली step है।आज मैं ये बताने वाली हूं कि इसे कैसे बनाते है।
सबसे पहले में ये बताऊंगी की slip knot किसे कहते है।
Slip का मतलब है – सरकाना
knot का मतलब है – गांठ
एक ऐसी गांठ जिसे सरकाकर ढीला या टाइट (tight)कर सके,और जिसे खींच कर आसानी से खोल सके।
सलाई पर फंदे डालने के पहले slip knot के द्वारा सबसे पहले एक फंदा बनाते है,फिर आगे के फंदे को डालते है।
Slip knot stitch बनाने का तरीका:-
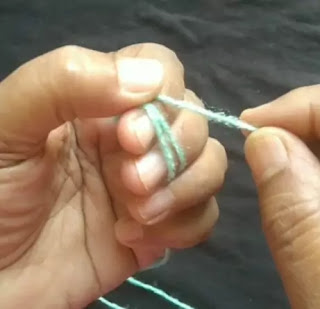
1- ऊन (Yarn) को दो उंगलियों के चारों ओर घुमाएंगे और दुबारा yarn को घुमाएंगे (इसे पहले वाले yarn के पीछे से घुमाना है।
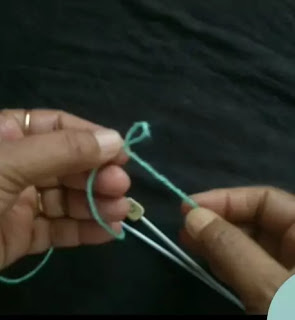
2- एक सलाई की मदद से एक फंदे को बनाने के लिए पीछे के yarn को आगे की yarn के नीचे से खींचेंगे।
3- एक छोर को खींच कर tight कर लेंगे तो एक फंदा बन जाएगा।
इस फंदे को सलाई पर चढ़ा लेंगे और एक छोर को खीच कर टाइट कर लेंगे।उसके बाद अपने अनुसार फंदे डालेंगे।
slip knot is the first step of knitting। Today I am going to tell you how to make it.
Method of slip knot stitch
1- Wind the yarn around two fingers and wind it again to the back of the first thread.
2- Using a knitting needle pull the back thread through the below of front one to form a loop.
3-Pull the yarn to tighten the loop.


