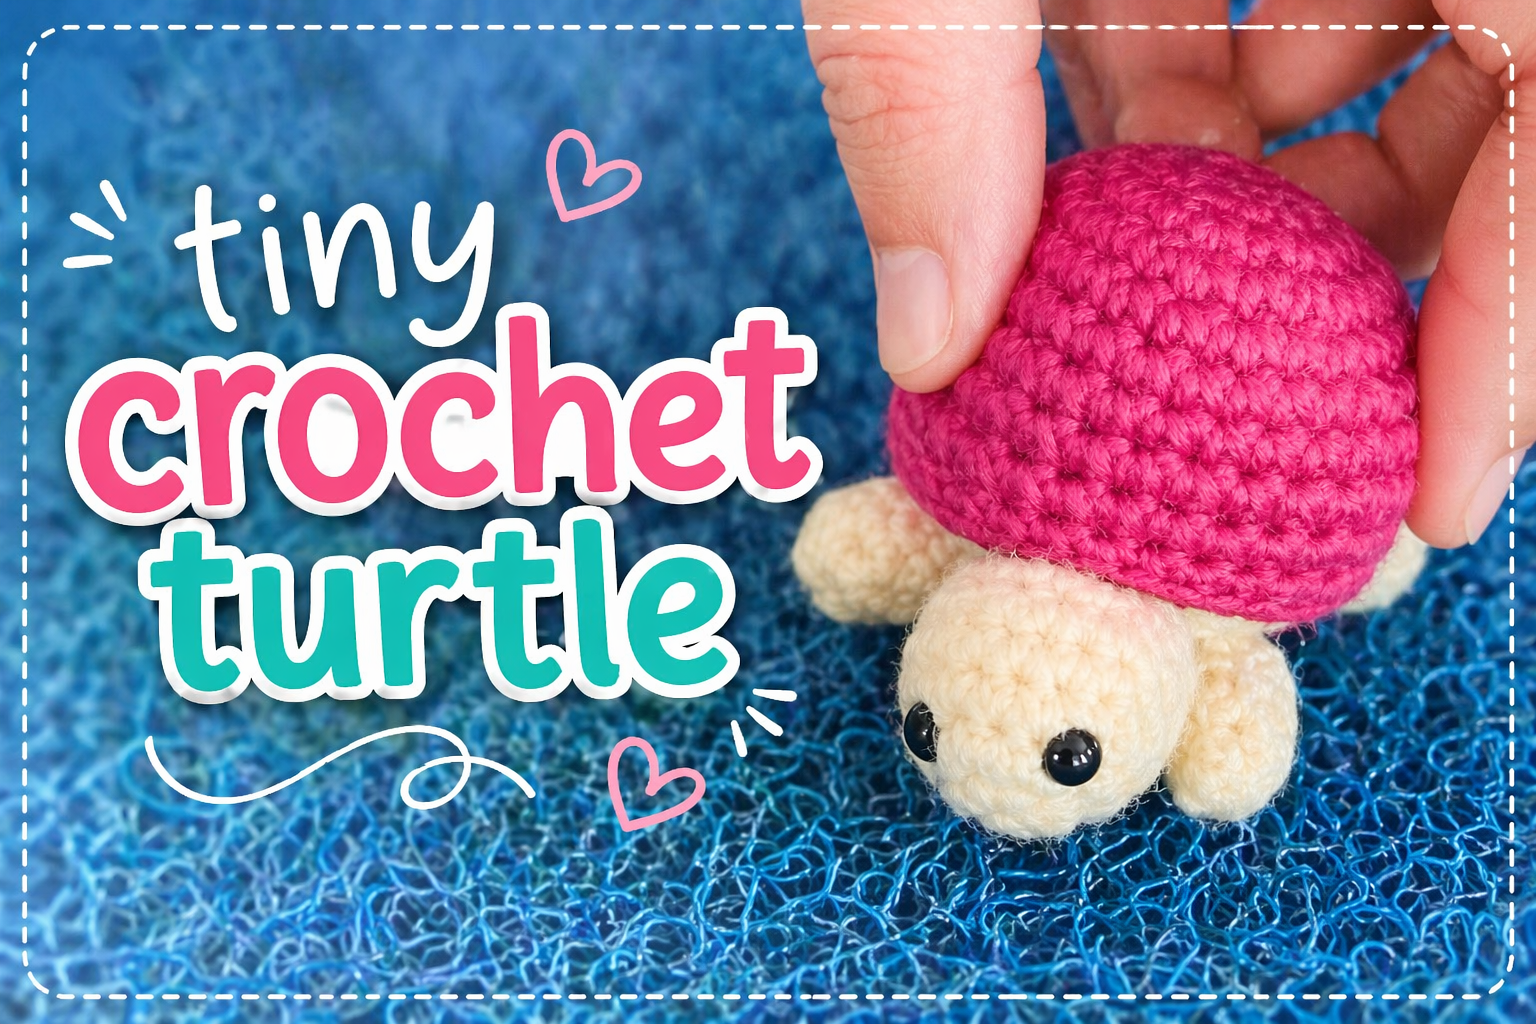
यह tiny crochet turtle एक प्यारा और आसान अमिगुरुमी प्रोजेक्ट है, जो शुरुआती लोगों के लिए बिल्कुल परफेक्ट है। अगर आप घर पर tiny crochet turtle बनाना चाहते हैं, तो यह step-by-step गाइड आपको एक खूबसूरत हैंडमेड टॉय बनाने में मदद करेगा।
आज के समय में crochet एक बहुत ही popular handmade art बन चुका है। छोटे-छोटे cute items जैसे keychain, toys और decoration pieces बनाना लोगों को काफी पसंद आता है।
अगर आप भी crochet सीख रहे हैं या कुछ नया और आसान project try करना चाहते हैं, तो tiny crochet turtle आपके लिए एक perfect option है।
यह turtle इतना cute और छोटा होता है कि आप इसे keychain, home decoration या gift item के रूप में भी use कर सकते हैं। सबसे अच्छी बात यह है कि इसे beginners भी आसानी से बना सकते हैं।
इस article में हम आपको step-by-step बताएंगे कि आप एक सुंदर crochet turtle कैसे बना सकते हैं।
Also Read this
Crochet Tulip Pattern – Beginners के लिए Easy और Beautiful Flower Stitch Guide
Best Crochet Basic Stitches for Beginners | SC, HDC, DC & TR Complete Guide
Best Knitting Patterns for Sweaters , Scarf
बच्चों के लिए हाथ से बनी ऊनी स्वेटर डिज़ाइन : gale se sweater banane ki vidhi
Tiny Crochet Turtle Banane Ke Liye Required Materials
किसी भी crochet project को शुरू करने से पहले सही materials होना बहुत जरूरी है। सही tools से काम आसान होता है और finishing भी अच्छी आती है। नीचे दिए गए basic materials से आप आसानी से यह turtle बना सकते हैं।
Yarn aur Hook Selection
आपको दो colors की yarn चाहिए — एक shell के लिए (bright color) और एक body के लिए (light color)। Hook size लगभग 3–4 mm होना चाहिए।
you will buy branded yarn from here
Extra Tools
Stitch marker, needle, scissors और fiber cotton (stuffing के लिए) की जरूरत होगी। Safety eyes optional हैं लेकिन इससे turtle और cute दिखता है।
How to Make a Tiny Crochet Turtle
Crochet turtle की शुरुआत हमेशा magic ring से होती है। यह technique beginners के लिए थोड़ी नई हो सकती है, लेकिन practice से आसान हो जाती है। यह turtle का base बनाने का सबसे जरूरी step है।
First Round (6 Single Crochet)
सबसे पहले magic ring बनाएं और उसमें 6 single crochet करें। इसके बाद ring को tight कर दें ताकि बीच में hole ना रहे।
You can learn basic stitches here:
Second Round (Increase)
अब हर stitch में 2 single crochet बनाएं। इससे total 12 stitches हो जाएंगे और shape बढ़ने लगेगी।
Rounds Ko Increase Karke Shape Dena
अब धीरे-धीरे turtle का shell shape तैयार होगा। इसके लिए आपको हर round में stitches को increase करना होगा। यह process बहुत important है क्योंकि इससे turtle का size और shape बनता है।
Third Round (1 SC + Increase)
एक stitch में 1 single crochet और अगले में increase करें। इस pattern को repeat करें। इससे 18 stitches बनेंगे।
Fourth aur Fifth Round (More Increase)
इसी तरह आगे rounds में stitches बढ़ाते जाएं। 24 और फिर 30 stitches तक पहुंचें ताकि shell का proper size बन सके।
Body aur Shell Ko Define Karna
जब shell का base तैयार हो जाए, तब body को shape देना शुरू करते हैं। यहाँ पर front loop और back loop का use होता है जो turtle की design को realistic बनाता है।
Front Loop Crochet
2 rounds तक सिर्फ front loop में single crochet करें। इससे turtle का अंदर वाला हिस्सा बनता है।
Color Change aur Back Loop
अब color change करें और back loop में crochet करें। इससे shell और body अलग-अलग दिखते हैं और design attractive बनता है।
Decrease Karke Shape Close Karna
अब turtle की shape को बंद करने के लिए stitches कम (decrease) करने होते हैं। यह step shape को perfect बनाता है और stuffing के बाद अच्छी finishing देता है।
Decrease Technique
दो stitches को मिलाकर एक बनाना होता है। इसे decrease कहते हैं। इससे stitches धीरे-धीरे कम होते हैं।
Final Closing
जब stitches कम होकर 12 या उससे कम हो जाएं, तब yarn को cut करके end को secure करें और shape को बंद करें।
Head, Legs aur Tail Banana
Turtle को complete करने के लिए उसका head, legs और tail बनाना जरूरी है। ये सभी parts छोटे-छोटे होते हैं और आसानी से बन जाते हैं।
Head Banana
Magic ring से 6 stitches बनाकर धीरे-धीरे increase करें। फिर stuffing भरकर shape दें और safety eyes लगाएं।
Legs aur Tail
चार legs और एक tail बनाएं। हर part में 5 stitches लेकर 2–3 rounds तक crochet करें।
Assembly aur Finishing
अब सबसे important step आता है — सभी parts को जोड़ना। सही assembly से turtle का final look बहुत सुंदर बनता है।
Parts Ko Stitch Karna
Needle की मदद से head, legs और tail को body से attach करें। पहले pin से position fix करें फिर stitch करें।
Keychain Option
अगर आप इसे keychain बनाना चाहते हैं, तो tail के पास chain बनाकर उसमें key ring लगा दें।
watch full video, given below:-
Short Pattern
Tiny Crochet Turtle (Ultra Short Pattern)
Hook: 3–4 mm
Yarn: 2 colors (shell + body)
Other: stuffing, needle, stitch marker
Shell (Top Part):
MR
R1: 6 sc
R2: inc ×6 → 12
R3: (1 sc, inc) ×6 → 18
R4: (2 sc, inc) ×6 → 24
R5: (3 sc, inc) ×6 → 30
R6–8: sc around (30)
R9–10: FLO sc around (30)
Change color
R11: BLO sc around (30)
R12: (3 sc, dec) ×6 → 24
R13: (1 sc, dec, 1 sc) ×6 → 18
R14: (1 sc, dec) ×6 → 12
Stuff, close
Head:
MR
R1: 6 sc
R2: inc ×6 → 12
R3: (1 sc, inc) ×6 → 18
R4–5: sc around (18)
R6: (1 sc, dec) ×6 → 12
R7: sc around (12)
Add eyes, stuff, close
Legs (Make 4) + Tail (Make 1):
MR
R1: 5 sc
R2–3: sc around (5)
Fasten off
Assembly:
Sew head, legs, tail to body
(Optional: add chain loop for keychain)
Tiny crochet turtle बनाना एक बहुत ही fun और creative process है। यह project beginners के लिए आसान है और result बहुत cute आता है।
आप इसे gift, decoration या keychain के रूप में use कर सकते हैं। थोड़ी practice से आप इसे और भी बेहतर बना सकते हैं और अपने handmade products को sell भी कर सकते हैं।

