Crochet Roses – एक खूबसूरत क्रोशिया Rose बनाने का आसान तरीका
Crochet rose बननेबनाने का अपना एक अलग ही मजा है । ये एक ऐसा handmade है जो कभी मुरझाता नहीं । आप crochet beginner हो या expert , ये crochet rose pattern आपको जरूर पसंद आयेगा ।क्योंकि इसे बनाने के लिए कोई एक्स्ट्रा material की जरूरत नहीं होती । सिर्क मनपसंद कलर की यार्न , क्रोशिया , कैंची और सुई की जरूरत हैं .इस्क्रोचेट आर्टिकल आपको मिलेगा rose free pattern, tips for crochet red rose, pink rose, mini rose।
Crochet Roses यानी क्रोशिया से बने गुलाब के फूल हर मौसम में ट्रेंड में रहते हैं। चाहे आप Valentine gift बना रहे हैं, या फिर कोई home decor project हो – एक crochet Pink Rose, crochet White Rose या crochet Red Rose अलग ही charm भर देते हैं।
ये हर gift में एक charm भर देते हैं। आइए इस article में हम धीरे-धीरे सीखेंगे how to crochet roses with free patterns, easy tips और थोड़ा सा creative twist।
Crochet Rose – handmade फूल जो सभी को पसंद आए
Crochet rose ek aisa evergreen design hai jo kisi bhi gift, decoration, ya bag ko sundarta se bhar deta hai. Ye crochet flower pattern rose beginners ke liye bhi perfect hai aur gifting ke liye bhi.
crochet Rose बनाने के लिए जरूरी समान (Materials Needed)
• Red or pink yarn 4 ply (cotton or acrylic)
• Crochet hook (2.5 – 3mm )
• Scissors
• Yarn needle
• green yarn for calyx
Calyx Pattern
Step 1: Start by making 6 double crochets (dc) into a magic ring. Once you’ve made all 6, join with a slip stitch (sl st) to the top of the first dc to close the round.
👉 Don’t close the ring too tightly! Keep a small hole in the center – you’ll need this space to slide in a floral wire or a wooden stick.
Step 2:
Chain 7 (ch 7), then work your way back down the chain like this: (sl st, sc, hdc, dc, dc, tr).
Slip stitch into the next stitch in the ring.
Repeat this leaf pattern 6 times total to make a full calyx of 6 leaves.
Fasten off (FO) after the last leaf and leave a short yarn tail.
Tie both yarn tails (starting and ending) in a secure knot and weave in the ends.
Tie both yarn tails (starting and ending) in a secure knot and weave in the ends.
Leaf Pattern
Optional, 1 leaf per stem
First: Cut approximately an 8″ piece of 22 gauge flexible floral wire. You will need this for the leaf.
In green:
Step 1:
Ch 12 (12)
Step 2:
For the leaf, you will be crocheting around the floral wire.
Starting from the third chain from the hook:
sc, HDC, DC, DC, TR, TR, DC, DC, HDC, 3 sc in the last chain.
👉 To crochet around the wire, hold the wire in your hand alongside your work. Insert your hook through the chain and create a single crochet as usual, but make sure your stitch is created around the wire, holding it in place.
—
Step 3:
Fold your wire in half, with your work on the right side of the wire.
We will now be working on the lefthand side of the wire, from right to left.
Sk 1 st, HDC, DC, DC, TR, TR, DC, DC, HDC, SC
👉 This is what your leaf will look like after Step 2
after folding your wire in half. For Step 3, you’ll be working down the opposite side of your chain and wire to form the other half of your leaf. Crochet over your tail so you don’t need to weave it in later.
—
Step 4:
If you like the look of your leaf, FO, leaving a short tail.
Weave in your tail.
Twist the remaining wire together so your work doesn’t slide off.
👉 Your leaf should look like this when finished. Twist the bottom of the wire to prevent your work from sliding off.
👉 The leaf will look like this without Step 5.
—
Step 5
(Optional – For Textured Edge)
Sl st, chain 1, and sl st to the next st.
Repeat this around the entire leaf. FO, weave in the end. Cut off any excess.
👉 This is the finished leaf with the textured edge. Adding a Ch 1 between each sl st creates this ridge.
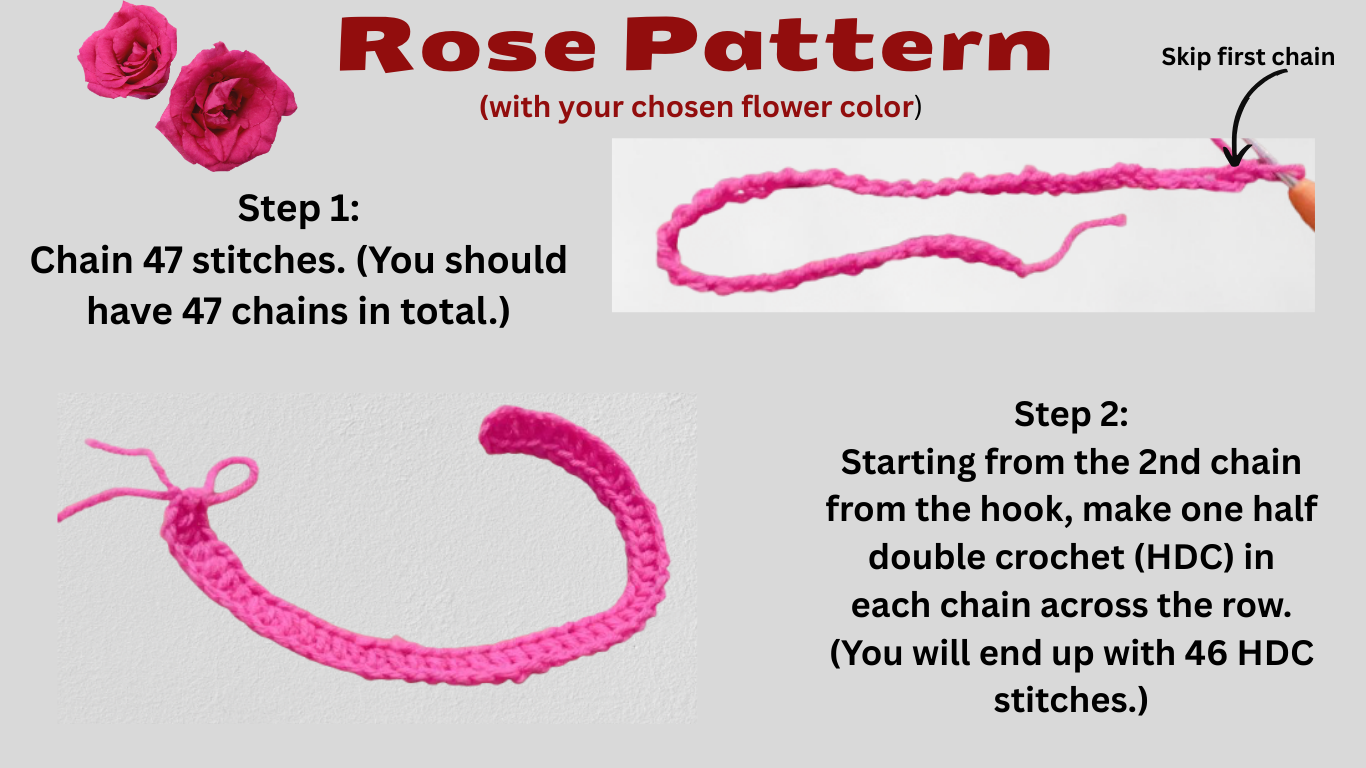
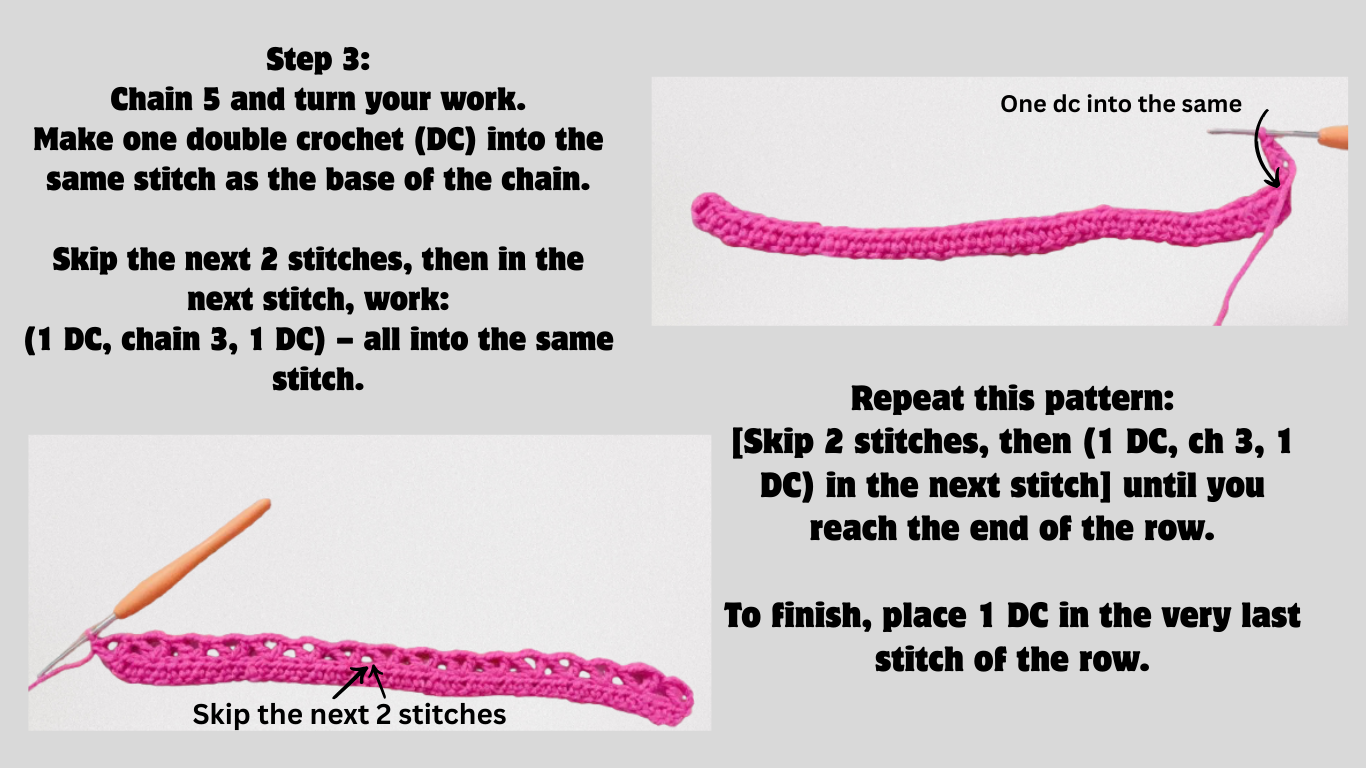
🌹 Rose Assembly –
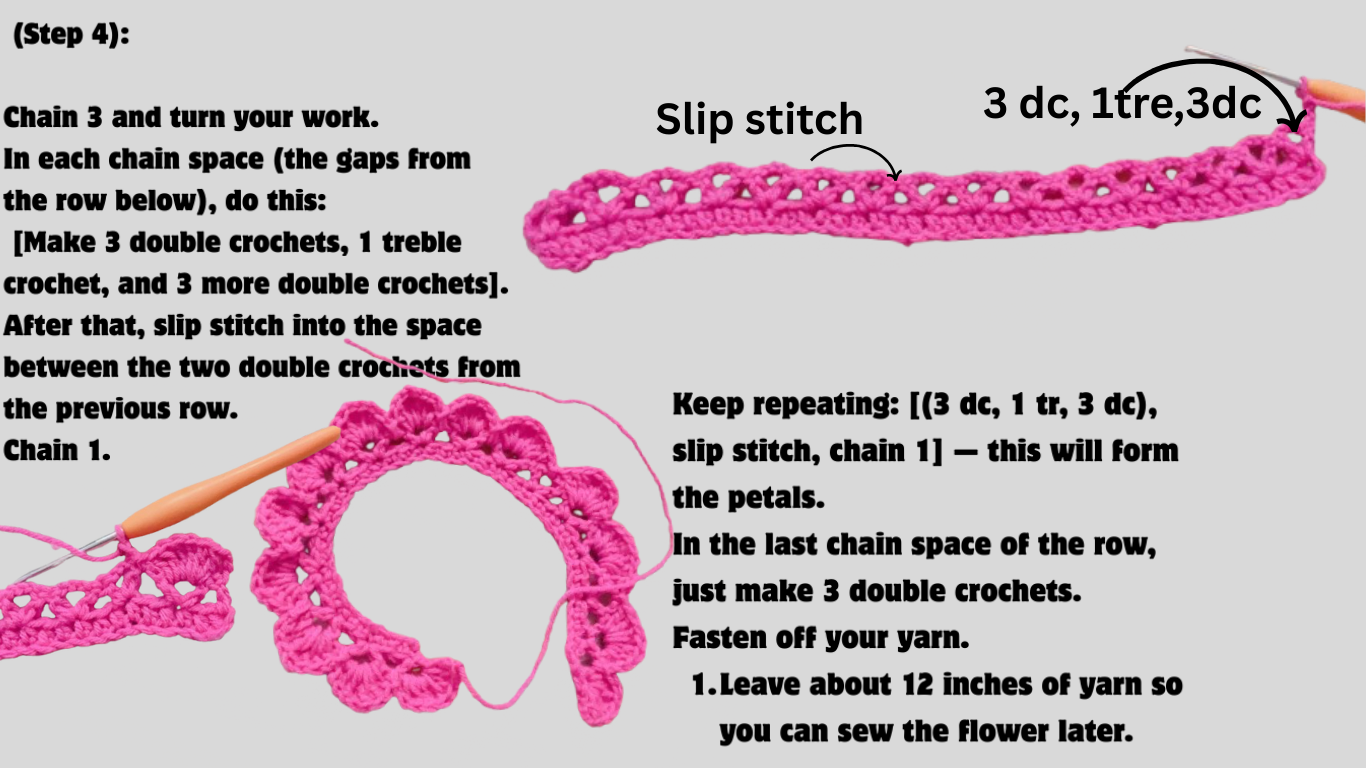
Part 1: Making the Petals
Step 1: Start with the side that doesn’t have yarn ends. Make sure the nice side (the front) is facing you.
Step 2: Fold the first petal in half.
Step 3: Keep wrapping the petals around from right to left. Fold them one over the other. It will start to look like a rose.
Step 4: When you reach the end, move and shape the petals the way you like. I like to keep the middle petals tight and the outer ones a little loose, like a real flower.
🪡 Part 2: Sewing the Rose
Step 5: Put your needle through the longest yarn tail.
Step 6: Sew across the last petal a few times to hold it in place.
Step 7: Sew a few stitches through the bottom of the rose to keep it strong. These stitches don’t have to be perfect.
Step 8: When the rose feels tight and secure, tie the yarn ends together. Hide the ends inside and cut off any extra yarn.
Now your rose is ready! You can move the petals a bit to make it look perfect.
🌿 Part 3: Adding the Wire, Calyx, and Leaf
Step 1: Put the floral wire through the middle of your rose. Turn it over and make sure the wire doesn’t show on top. If it looks good, take it out, add a little hot glue to the wire, and put it back in.
Step 2: With the back side of the calyx facing you, slide the wire through its center hole. Push it up until it touches the rose.
Step 3: Place the calyx so that each leaf sits between two petals of the rose.
Step 4: Once it’s in the right place, add a small drop of hot glue at the base of the rose. Slide the calyx down and stick it there.
🌿 Part 4: Wrapping the Stem and Adding the Leaf
Step 5: Add a little hot glue on each leaf and stick them under the calyx. Do this for all 6 leaves.
Step 6: Add glue where the calyx meets the wire. Attach green yarn (same as calyx). Twist and wrap the yarn around the wire before the glue dries.
Step 7: After wrapping about 1.5 to 2 inches, add your leaf. Hold the leaf and wire together, and wrap the yarn around both to secure it.
Step 8: At the bottom of the stem, add a little glue. Wrap the yarn over it and cut off the extra yarn.
